Download Tecno Camon 12 CC7 Da file and use it to bypass FRP or when a secure boot file is required during flashing.
TECNO Camon 12 is powered by the Mediatek MT6762 Helio P22 Octa-core 2.0 GHz Cortex-A53 processor. The smartphone comes with a 6.52 inches IPS LCD capacitive touchscreen and 720 x 1600 pixels resolution.
The rear camera consists of a 16 MP + 8 MP + 2 MP depth sensor lenses.
The front camera has a 16 MP sensor. The phone’s sensors include Fingerprint (rear-mounted), accelerometer, and proximity.
The smartphone is fueled by a Non-removable Li-Po 4000 mAh battery.
The phone runs on Android 9.0 (Pie) + HIOS 5.5.
The TECNO Camon 12 comes in different colours like Dawn Blue, Dark Jade, and Sky Cyan. It features MicroUSB 2.0.
Tecno Camon 12 Core features
- Model: Camon 12 CC7
- Material: Plastic
- 2G: Yes
- 3G: Yes
- 4G: Yes
- SIM: Dual nano SIM
- Body Dimensions: 166 x 75.8 x 8.2 mm, 170.7 grams
- Display Type: IPS capacitive touchscreen with 16,000,000 colors
- Display Size: 6.52 inches, 720 x 1600 pixels, 269 pixels per inch (PPI)
- SD Card slot: Yes, MicroSD card
- Internal Memory: 64 GB
- RAM: 4 GB
- OS: Android 9.0 Pie (HiOS 5.5)
- Processor: 2.0GHz octa-core Cortex-A53
- CPU: MediaTek MT6762 Chipset
- GPU: PowerVR GE8320
- WIFI: Wi-Fi 802.11 a,b/g,n WIFI hotspot
- Bluetooth: Version 5.0 A2DP
- GPS: A-GPS
- NFC: No
- USB: MicroUSB v2.0
- Primary Camera: 16 + 8 + 2 MP HDR, panorama camera with Quad-LED flash
- Secondary Camera: 16 MP HDR
- Video: 1080@30fps
- Battery Capacity: 4000mAh Li-Po battery
Requirements to use this DA file
- An MTK flash tool like SP flash tool, NCK Box or dongle, Miracle CM2 MTK, Miracle Box, etc.
- Android MTK USBVCOM drivers
- A USB cord
- A computer
Using the DA file
- Next, extract and launch the loader of NCK dongle.
- Once it opens, click on the setting tab and load Tecno POP 1 custom DA file from where you extracted.
 |
| loading Tecno CC7DA file on NCK dongle |
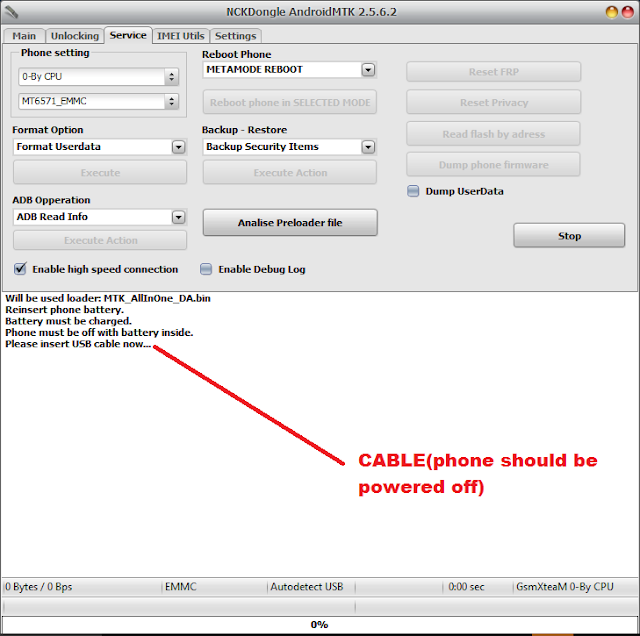
- After loading the DA file, head back to the services tab and click on Reset FRP.
 |
| Click on reset FRP under services |
- At this point after clicking on the "Reset FRP" button, power off your device and connect to the computer via USB.
 |
| Power off the device and connect to the Computer |
- Now with the drivers installed, and your charging circuit working perfectly, NCK dongle should be able to detect your device
- The bypassing process will take only a couple of seconds.
- Once done with the bypassing, you should have a screen like the one below.
 |
| Tecno CC7 frp reset done |


COMMENTS